
 Pin
Pin
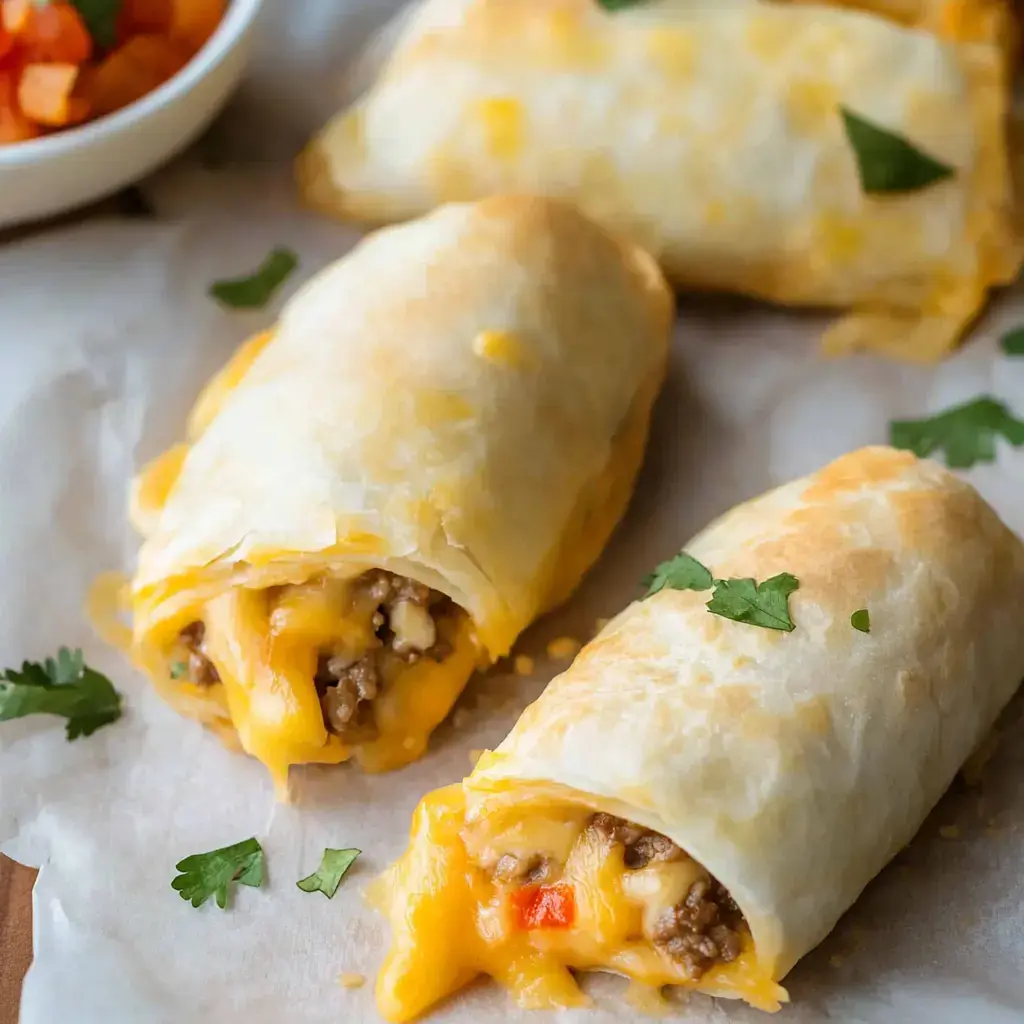
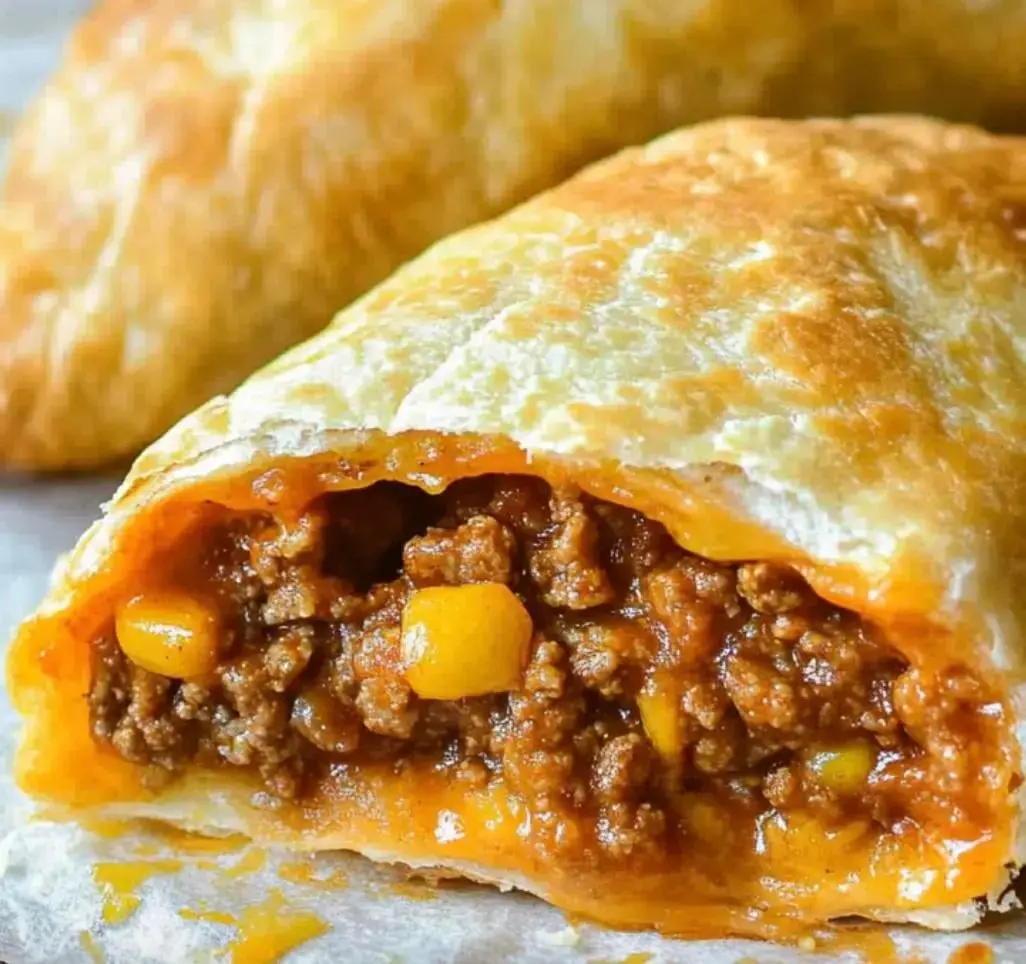
These tortilla pouches are absolutely fantastic - just seasoned meat and melty cheese wrapped in crunchy tortillas. They're somewhere between a folded taco and a portable snack pouch. Super easy to whip up and they taste downright delicious.
Why Make These
They're crowd-pleasers - kiddos always want more and adults can't resist them either. Toss in whatever cheese you fancy, make them hot or mild. Way less messy than traditional tacos. You can prepare them beforehand and heat them up when needed.
What You Need
- Beef: Standard ground beef
- Taco Mix: A single store-bought packet
- Soft Cheese: Plain cream cheese
- Salsa: Whatever type you prefer
- Cheese: Grated cheddar
- Butter: For browning them nicely
- Tortillas: Flour ones that bend easily
- For the top: Sour cream, additional salsa
 Pin
Pin
How to Make It
- Get everything ready:
- Warm your oven to 350°. Pull out your largest frying pan. Cover a baking tray with aluminum foil.
- Cook the meat:
- Toss beef into the heated pan. Smash it apart with a wooden spoon as it cooks. Let it go about 8-10 minutes until completely brown. Pour off all the fat using a colander.
- Add flavor:
- Return meat to pan. Add taco seasoning and some water (follow packet instructions). Stir thoroughly. Cook another 5 minutes until it gets thick.
- Make cheese mix:
- In a separate bowl, beat cream cheese until smooth (get rid of any chunks). Stir in 3-4 tablespoons of salsa. Mix until blended and slightly pinkish.
- Set up your station:
- Spread out all tortillas. Drop a generous spoonful of cheese mixture in each center. Top with cooked meat. Sprinkle generously with shredded cheese.
- Roll them right:
- Fold bottom edge over the filling. Tuck in both sides firmly. Continue rolling to the top. Place seam-side down on your baking sheet. Repeat with all remaining tortillas.
- Make them crispy:
- Melt butter in microwave (roughly 30 seconds). Brush each pouch thoroughly with butter - cover every part.
- Bake them up:
- Stick in oven for 15-20 minutes. Look at 15 - they should look golden and crisp. If not quite done, give them extra time.
- Last touches:
- Cool them 5 minutes so they won't burn your tongue. Add cold sour cream, diced tomatoes, extra salsa - whatever sounds good.
- Check and serve:
- Slice one open to confirm it's heated throughout. Enjoy while they're still warm and crispy.
Good Ingredients Matter
Go for 80/20 ground beef - drier meat means less spillage. Find soft, new tortillas at the grocery store (watch the expiration date). Grab cheese blocks and grate them yourself - they'll melt so much better than pre-packaged shreds. Leave cream cheese out for half an hour so it's completely soft and blends easily.
Getting Perfect Rolls
Warm tortillas in the microwave for 20 seconds covered with a damp paper towel - makes folding way easier. Place filling about 2 inches from the bottom. Use roughly 3 tablespoons meat and 2 of cheese mixture - overstuffing leads to bursting. Lift bottom edge over the filling, then pull it snug. Fold sides inward about an inch. Roll forward while keeping everything tight. If ends start opening, secure with toothpicks until cooking's done.
Mix Up The Fillings
Want extra heat? Throw in some chopped jalapenos. Need more veggies? Mix in sautéed peppers and onions (cook alongside the meat). Black beans work wonderfully - just drain them first. Try switching to pepper jack instead of cheddar. Need something milder? Leave out the diced tomatoes from your cheese mixture.
 Pin
Pin
Smart Kitchen Tricks
Make double meat when you cook tacos - save half for future pouches. Use foil on your baking tray - cleanup becomes super quick. Shred cheese while your meat cooks to save time. Got extra filling? It'll make awesome nachos tomorrow. Keep your butter really soft - makes brushing much simpler. Don't worry if cheese escapes during baking - those crispy edges taste fantastic.
Saving and Reheating
Cool them for half an hour before refrigerating. Wrap individually in foil, then pop in a zip bag - helps maintain crispness. They'll stay fresh about 4 days in the fridge. For reheating, warm oven to 350°, keep them wrapped in foil, heat 15-20 minutes. Want extra crunch? Unwrap during the final 5 minutes. Skip the microwave - you'll end up with sogginess. They freeze well too - wrap tightly, freeze up to 2 months. Heat frozen pouches for 25-30 minutes.
Wrap-Up
Obsessed with these? Next time, pile the same beef and cheese over chips for loaded nachos. Or roll them into beef enchiladas baked in sauce—just as awesome and all with what you’ve already got on hand.
Frequently Asked Questions About the Recipe
- → What if I skip the meat?
Totally doable! Try swapping for black beans (about 2 cans, partly mashed), lentils, or store-bought veggie crumbles. Add taco seasoning—about 2 spoonfuls per can—then toss in extra bits like corn or diced bell peppers. Want to bulk it up more? Use rice, too, but not too wet, or the tortillas will go soggy. Heat the filling, taste, and adjust the flavors before stuffing!
- → Can I make these ahead of time?
Yeah, just prep them early. Cook the meat and assemble the pockets, but wait to bake. Wrap each in plastic and stash them in an airtight container in the fridge. When you’re ready, unwrap, place them on a sheet, and bake. Add an extra 5-7 minutes since they’ll be chilled. A quick oil brush helps with crispiness. Super handy for meal prep or parties!
- → Can I switch to corn tortillas?
Yep! Warm each in the microwave wrapped in a damp paper towel for about 30 seconds first—this keeps them from cracking. They’re smaller, so expect around a dozen pockets instead of eight. Brush them with oil before filling. Just don’t add too much filling, or they’ll rip. Corn tortillas also crisp faster in the oven, so watch them closely. Perfect for anyone staying away from wheat!
- → How do I keep them from getting soggy?
They’re at their crunchiest fresh out of the oven! Leftovers? Skip the microwave—it’ll ruin the crunch. Heat in the oven at 350°, right on the rack or a baking sheet, for 5-7 minutes. Toaster ovens work for small batches. Too brown on the outside but cold inside? Cover lightly with foil. Want them even crispier? Brush with a little oil before reheating.
- → What’s good as a topping?
Create a mini topping bar! Go with cold toppings like diced tomatoes, shredded lettuce, chopped onions, black olives, guac, or sour cream. Sprinkle with extra cheese, or spice it up with pickled jalapeños and lime wedges. For snack spreads, dice toppings small—they’re easier to grab and eat. Extra tip? Use squeeze bottles for sour cream/guac to keep it fun and tidy, especially for kids!