
 Pin
Pin
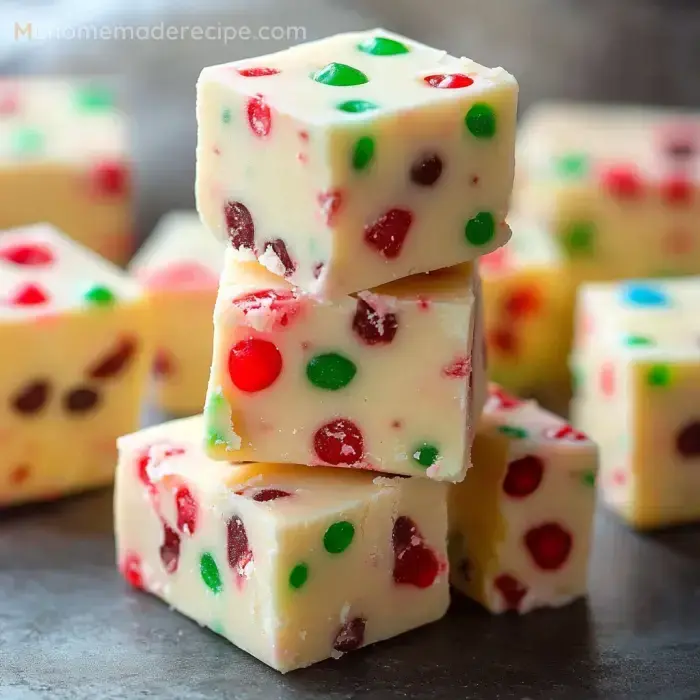
I just took my rainbow-colored white chocolate gumdrop fudge out the fridge and wow, my kitchen's never looked brighter! Whipped this up last Christmas when regular chocolate fudge felt too boring. All those colorful gumdrops really stand out against the white chocolate background – they remind me of tiny jewels. My little girl says it looks like we stole a piece of candy land, and I can't disagree!
The Magic Behind It
Threw this fudge together for our community bake sale yesterday and it vanished in under half an hour. Folks can't resist how different it looks from typical fudge, and the kiddos go wild for those gummy candy chunks. Only takes about 15 minutes to mix up before cooling in the fridge. Last holiday season I wrapped pieces in small boxes with fancy ribbons as gifts. That white chocolate really lets every colorful candy bit shine through.What You Need
- White chocolate: Grab premium chips from the baking section - cheap ones turn grainy
- Sweetened condensed milk: A single can works fine - watch out for grabbing evaporated milk
- Vanilla: A tiny bit elevates the chocolate flavor
- Gumdrops: Choose red and green for holidays, or any combo for other occasions
Making Your Fudge
- Prep your container
- Cover a square pan with aluminum foil - helps you pull everything out cleanly
- Melt the chocolate
- Combine chocolate and condensed milk on low heat - stir constantly to avoid burning
- Add vanilla flavor
- Pour in vanilla after chocolate melts - you'll love how it smells
- Mix in gumdrops
- Fold chopped candies into the warm mixture
- Fill the pan
- Dump the mixture in and flatten the surface with your spoon
- Let it set
- Put it in the refrigerator until solid - takes around two hours
What Makes It Special
The candies partly melt into the warm fudge but still show their bright colors on the surface. Cut into a fresh batch this morning that I made last night - each piece looks like a tiny treasure chest. The kids always hunt for pieces with their favorite colors, and those chewy candy bits make it way more fun than plain old fudge.Making It Perfect
Found out you must keep the flame low after my first attempt turned into a smoky disaster - my house smelled like burnt toast for a week. Taking time to line the pan correctly saves tons of headaches later. I created three batches for our family gathering last weekend - just have all your stuff measured and ready before the chocolate goes on the stove.About Those Gumdrops
Snip the gumdrops when they're still cold from the fridge - stops them from sticking everywhere. Now I keep a pair of scissors just for candy stuff after ruining my good ones with sticky candy goop. Christmas colors look great, but any mix works fine. Made a colorful version for my niece when she turned eight - it was the star of her dessert table.Keeping It Fresh
The fudge stays good in your fridge about seven days. I accidentally made too much and learned they freeze pretty nicely. Just separate layers with wax paper so nothing sticks together. They taste so much better when you let them warm up though, so take them out half an hour before you want to eat them.Serving Ideas
Make these pieces smaller than you would with normal fudge - they pack a sweet punch. Created cute teacher gifts with fancy tissue paper last Christmas. They fit perfectly on holiday cookie platters with other goodies. Sometimes I toss extra chopped candy on top right as the fudge starts firming up for more pops of color.Wrap-Up
Enjoy making these fun, festive sweets: Candy Cane Truffles and Raspberry Bark. Similar to this recipe, they use white chocolate, but the truffles bring minty peppermint and the bark has zingy raspberries. Perfect for gifting or holiday parties.
Frequently Asked Questions About the Recipe
- → Could I switch to dark chocolate?
Sure, but expect changes in both taste and appearance.
- → What’s the best way to store it?
Keep it refrigerated in a container for up to a week.
- → Would homemade gumdrops work?
Absolutely! They let you add unique flavors to the mix.
- → What if my pan isn’t square?
No problem—use any shape and cut the pieces as needed.
- → Can I skip using condensed milk?
No, it’s essential for achieving the proper fudge consistency.