
 Pin
Pin
Irresistible Cranberry Turkey Sliders for Crowds
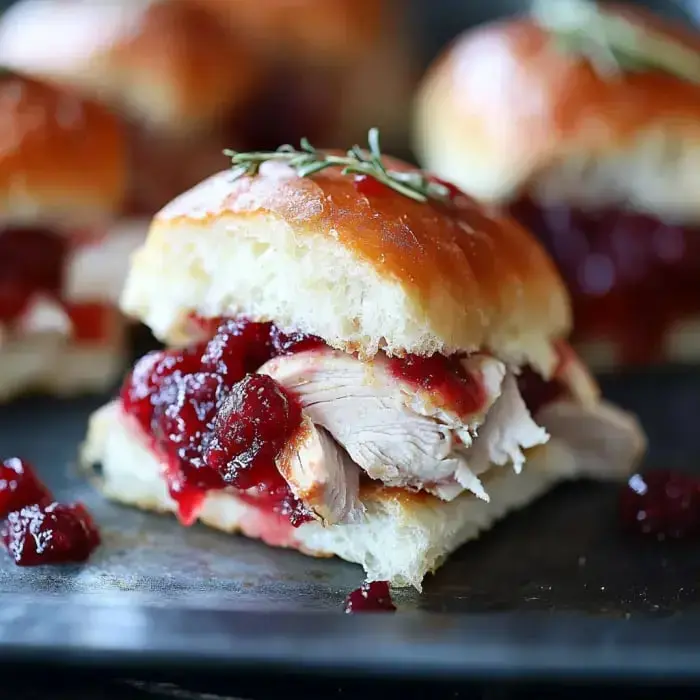
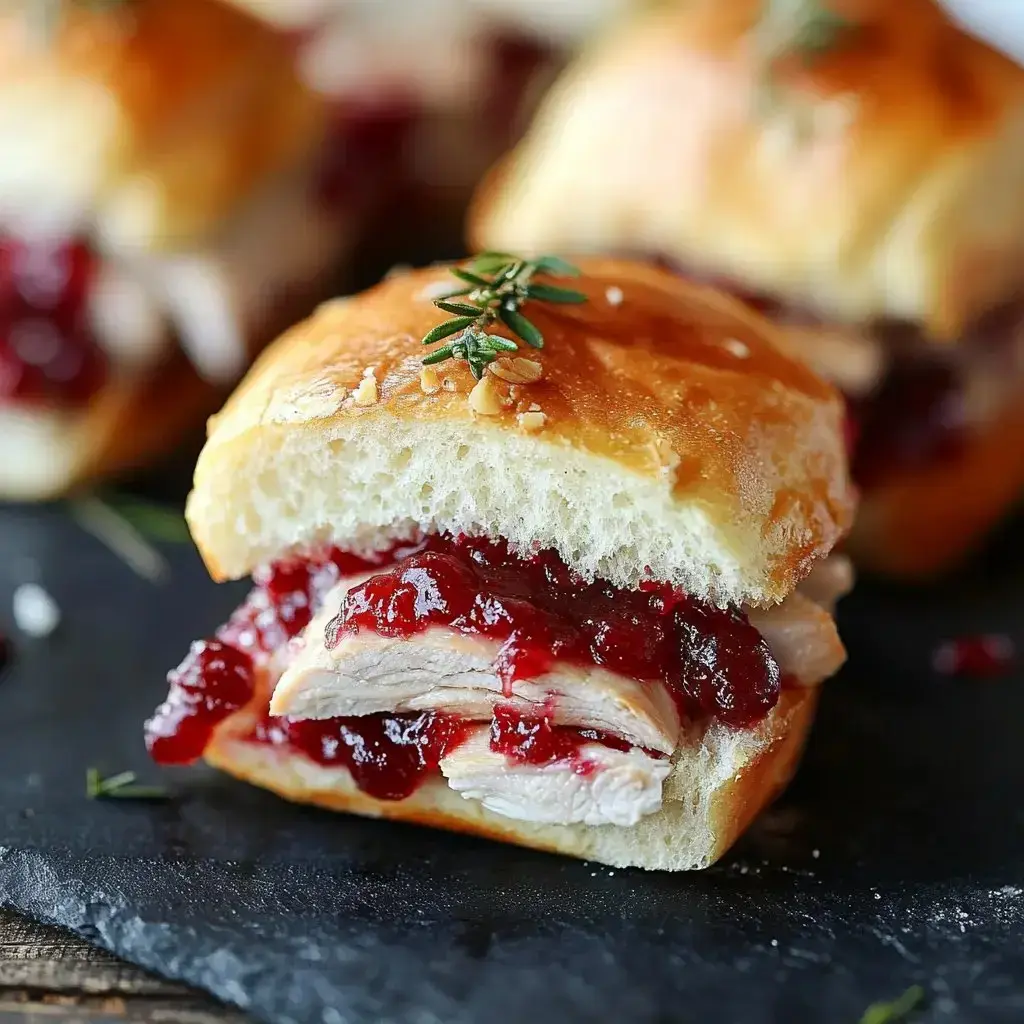
After holiday feasts, I can't think of a better way to use what's left than these Cranberry Turkey Sliders. They're total comfort food gold. I put turkey, tangy cranberry sauce, and gooey cheese between soft sweet buns, then coat them with an amazing seasoned butter mix before they go in the oven. They come out golden and stunning every single time, and they're so tasty you might cook turkey just to make these sandwiches.
What Makes These Sandwiches So Popular
Trust me, these mini sandwiches are mind-blowing good. Each bite gives you that killer mix of sweet, tart and savory flavors. I adore how flexible they are - perfect for a casual lunch, a fast dinner solution, or even breakfast the following morning. And they're such a clever way to turn your holiday extras into something completely different and mouthwatering.
Your Shopping List for Perfect Sliders
- Your Foundation: Pick up Hawaiian rolls or brioche slider buns for that perfect softness with a hint of sweetness.
- Melty Goodness: Swiss is my go-to, but don't hesitate to try Havarti, provolone, or even sharp cheddar.
- Main Player: Holiday turkey leftovers work beautifully, though deli slices can save the day when needed.
- Tart Balance: Any cranberry sauce works wonders - from the fancy homemade stuff to the jellied can variety.
- Butter Blend: Plain melted butter transforms everything it touches.
- Flavor Boosters: A smear of Dijon and splash of Worcestershire add incredible depth.
- Spice Mix: Simple garlic powder and dried basil bring all flavors together.
- Finishing Touch: Tiny poppy seeds make the tops look fantastic.
 Pin
Pin
Step-by-Step Cooking Guide
- Prep Work
- Warm your oven to 375°F, put foil in a baking dish, and hit it with cooking spray.
- Assembly Time
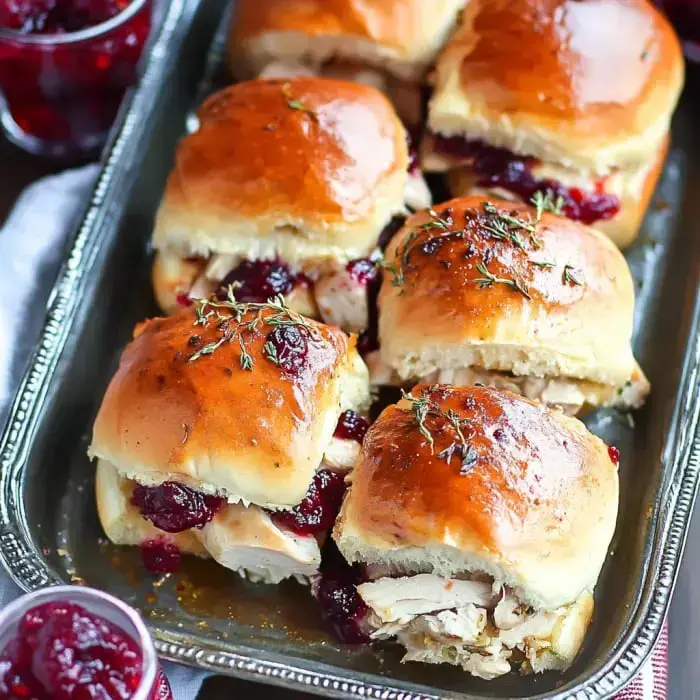
- Slice those connected buns horizontally, place bottom halves in your dish, then stack cheese, turkey, cranberry sauce, another layer of cheese, and cap with the top buns.
- Flavor Magic
- Mix melted butter with Dijon, Worcestershire, and your spices, then generously paint it over the tops and sides of your slider buns.
- Oven Magic
- Tent with foil and cook for 15 minutes, then pull the foil off and go another 5-10 minutes until tops turn golden and cheese gets all stretchy.
- Serving Moment
- Separate into individual sliders and watch how quickly everyone grabs them.
Tricks for the Best Results
Skip the pre-shredded stuff and grate cheese yourself for way better melting. Want extra crunch? Lightly toast your buns before you build. If you've got a sweet tooth, drizzle some honey into your butter mix. And fair warning - you'll need extras because these vanish incredibly fast at gatherings.
Storage Secrets
If you somehow end up with extras, stick them in a sealed container and they'll keep nicely in your fridge for about 3 days. You can actually freeze them up to 3 months too. When hunger strikes, warm them in a 350°F oven for around 15 minutes or just nuke them quickly if you're in a rush.
Mix It Up Your Way
Feel free to play around with the basic idea. Switch out the buns, try different cheese combos, or swap turkey for leftover chicken or ham slices. Sometimes I add some heat with hot sauce or crushed red pepper. It's really about making the recipe fit what you love.
 Pin
Pin
Frequently Asked Questions About the Recipe
- → Can I swap in deli-sliced turkey?
Sure! Thick deli slices work well in place of leftovers. Just go for a hearty cut for the best bite.
- → What rolls should I pick?
Sweet Hawaiian rolls are ideal, but any pull-apart dinner rolls will work. Keep the rolls intact when building your sliders.
- → Is it possible to prepare these early?
Yes, put them together up to a day in advance. Wait to add the butter topping until you're ready to bake. Keep covered in the fridge until then.
- → What's a good swap for Swiss cheese?
Try white cheddar, Havarti, or provolone instead. Any mild cheese that melts nicely with turkey is a good match.
- → Are these freezable?
They freeze fine before baking. Let thaw overnight, then add the butter topping and bake when you're ready.