
 Pin
Pin
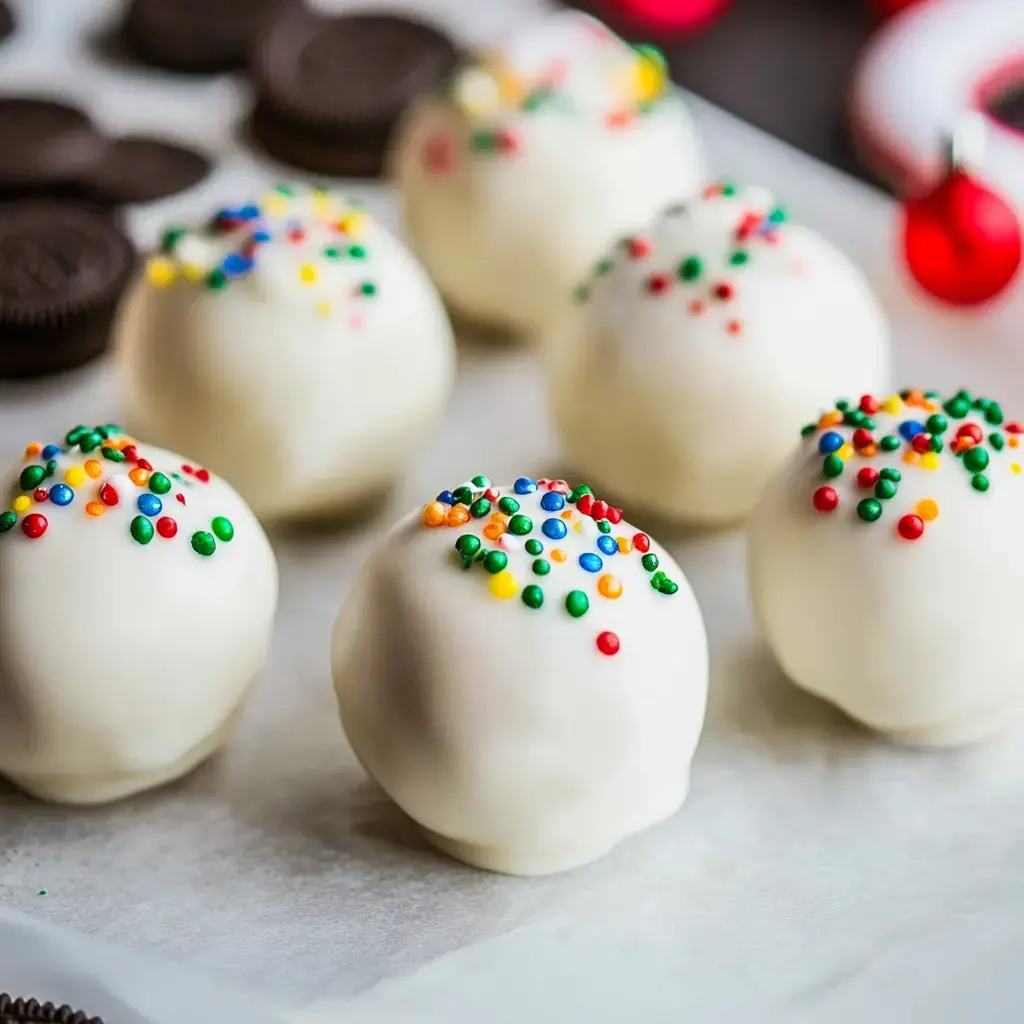
What Makes These So Popular
You'll only grab three ingredients - Oreos, cream cheese, and white chocolate. Toss in some holiday sprinkles for a festive touch. You can make them way ahead of your event - they store wonderfully in the fridge. They seem fancy but come together in no time.Ingredients List
- Oreos: Full package, don't remove the cream center
- Cream Cheese: Make sure it's room temperature
- White Chocolate: Choose one that's good for melting
- Sprinkles: Christmas colors work best
Step-By-Step Instructions
- Prep area:
- Line a baking sheet with parchment
- Process cookies:
- Grind Oreos in food processor until they look like soil
- Combine ingredients:
- Add ground cookies and softened cream cheese into a bowl. Knead by hand until well combined
- Shape mixture:
- Form small marble-sized balls. Chill in freezer for 15 minutes
- Prepare coating:
- Microwave white chocolate in intervals, stirring between until it's runny
- Coat the balls:
- Submerge each ball in melted chocolate. Allow excess to run off
- Add decoration:
- Quickly sprinkle toppings while chocolate is still wet
- Refrigerate:
- Store in fridge until ready to serve
Why They're Irresistible
These sweet bites combine everyone's favorites - Oreos, cream cheese, and white chocolate. With sprinkles on top, they look just like festive holiday candy. Set them out at your gathering and they'll disappear in minutes.Why This Recipe Works
The magic happens with just a few ingredients. Pulverize Oreos, blend with cream cheese till it's creamy. The white chocolate shell gives them a special touch. Holiday sprinkles on top make them totally Christmas-ready.Decoration Ideas
Play around with decorations - holiday sprinkles are always winners. Shape some to resemble tiny snowmen. Smash candy canes for a minty topping. You might even zigzag colored chocolate across the tops. Get creative with your own style.Helpful Hacks
When the mixture feels stiff, your fingers work way better than utensils. A tiny bit of oil helps thin stubborn chocolate. Grab a small cookie scoop for perfectly uniform balls. Use parchment so nothing gets stuck.Storage Solutions
Store them in an airtight container in your fridge. They'll stay tasty for up to seven days. Want to plan further ahead? Pop them in the freezer where they'll last two months. Great for planning ahead or packaging as presents.Tasty Variations
Switch things up each batch you create. Give milk chocolate a try instead. Throw in crushed peppermint pieces. Cover them in chopped nuts. They turn out yummy no matter how you customize them.Perfect Occasions
Ideal for holiday get-togethers. Children love helping shape the balls and add decorations. Make a bunch as handmade gifts. Take them to office celebrations - folks always want seconds.Troubleshooting Guide
Mixture too gooey? Cool it down in the fridge. Chocolate clumping? Heat more gradually. Balls crumbling? Freeze them a bit longer. Most issues have simple solutions.Presentation Pointers
Let them sit out briefly before serving. They taste better slightly warmed up. Arrange them on a decorative dish alongside other holiday cookies. Keep extras chilled until needed.Gifting Suggestions
Arrange them in cute containers with tissue paper. Include ingredient cards with each package. Display them beautifully at party dessert tables. Everyone will ask you how to make them after one bite.Wrap-Up
Can't get enough? Try these other easy treats:
- Oreo Shake: Creamy cookie goodness in a cup
- Quick Oreo Tart: Looks fancy but isn’t
- Oreo Cheesecake Squares: Ideal for sharing
- Oreo Pie: Turn cookies into the easiest crust ever
Frequently Asked Questions About the Recipe
- → Can I swap the chocolate?
Absolutely! Use dark chocolate for a bold flavor or milk chocolate for something sweeter. Color melts can make it look extra festive—red or green works great for Christmas. Chocolate chips aren't ideal though—they don't melt as smooth!
- → How do I store them?
Keep them in an airtight container in the fridge—they'll last up to two weeks. Want to save them longer? Pop them in the freezer, where they'll stay good for two months. Just let them defrost for 30 minutes before munching. Avoid leaving them out too long—they get soft fast.
- → What about a dairy-free version?
Yep, that's doable! You'll need dairy-free cream cheese (the tub version works best) and some dairy-free chocolate. The flavor's a little different but still tasty. And some stores now have vegan Oreos—check for them!
- → Any tips for melting chocolate?
The microwave is super quick—zap it for 30 seconds, stir, and keep going in 10-second bursts. You can also use a double-boiler (put a bowl over simmering water). No water should touch the chocolate! If it gets too thick, stir in a bit of oil. Keep it warm while you're dipping.
- → How long do they set?
Give the mix about 15 minutes in the fridge before rolling. After dipping, leave them in the fridge for another 30 minutes to harden. If you're in a rush, pop them in the freezer for 10 minutes. This step's key—they'll fall apart if they aren't chilled enough!