
 Pin
Pin
Finding a decent gluten-free dinner roll recipe felt impossible after my family got our celiac diagnosis. We tried so many recipes but ended up with rolls that were either hard as rocks, fell apart in our hands, or just tasted awful. Everything changed when I took a cooking class with Rachel who used to run Gluten Free Mama. That's where I finally got what we'd been looking for.
Though Rachel's original instructions aren't on the web anymore, she let me tweak her formula to pass along to others. I've changed it a bit, and now we can't go without these rolls. They're so good we make them for every holiday and at least once monthly throughout the year. They're not just an okay substitute - they're actually delicious!
My Journey Finding This Formula
Making gluten-free rolls used to drive me crazy. Each batch was a letdown, giving us something more like hard biscuits than the fluffy rolls we missed. Then Rachel showed me her technique. Her smart mix of alternative flours and extra ingredients created rolls nobody could tell were gluten-free.Why This Version Works
What I'm showing you today builds on Rachel's foundation but with my own touches to make sure anyone can bake amazing gluten-free rolls at home. These aren't just side items - they're the highlight of many meals at our table. They come out cloud-soft inside, have a rich buttery taste, and bring pure joy with every bite.Where It All Started
This comes from Rachel's careful testing of gluten-free baking methods. She wanted to create rolls that matched traditional ones in both feel and flavor, and she totally nailed it. The magic happens through carefully chosen ingredients and following specific steps.What You'll Need
- Quality Flour Mix: 2¾ cups (11½ oz.) of any premium gluten-free flour combination. Try Gluten-Free Mama's Almond blend, Authentic Foods Multi-Blend, or something similar that already has xanthan gum mixed in.
- Xanthan Gum: 1 1/2 tsp. Skip this if your flour already contains it.
- SAF Instant Yeast: 2 tsp.
- Sugar: 1/4 cup.
- Salt: 1 tsp.
- Water: 1 cup (warm to 105-110°F).
- Fat Option: 2 Tbsp. butter, dairy-free spread, or Spectrum organic shortening.
- Egg: 1, best if not cold from fridge.
- Apple Cider Vinegar: 1 tsp.
Getting Started
- Step 1:
- Put all dry stuff into a big bowl first. That means your gluten-free flour mix, xanthan gum, yeast, sugar, and salt. Stir them together so everything mixes well.
- Step 2:
- While your mixer runs slowly, pour in the warm water, melted fat choice, egg, and vinegar bit by bit. Keep mixing until you can't see any dry spots. Turn the speed up to medium and let it go for 3 minutes until your dough looks smooth all through.
Making Roll Shapes
- Step 1:
- Get an 8" or 9" round pan and coat it with cooking spray.
- Step 2:
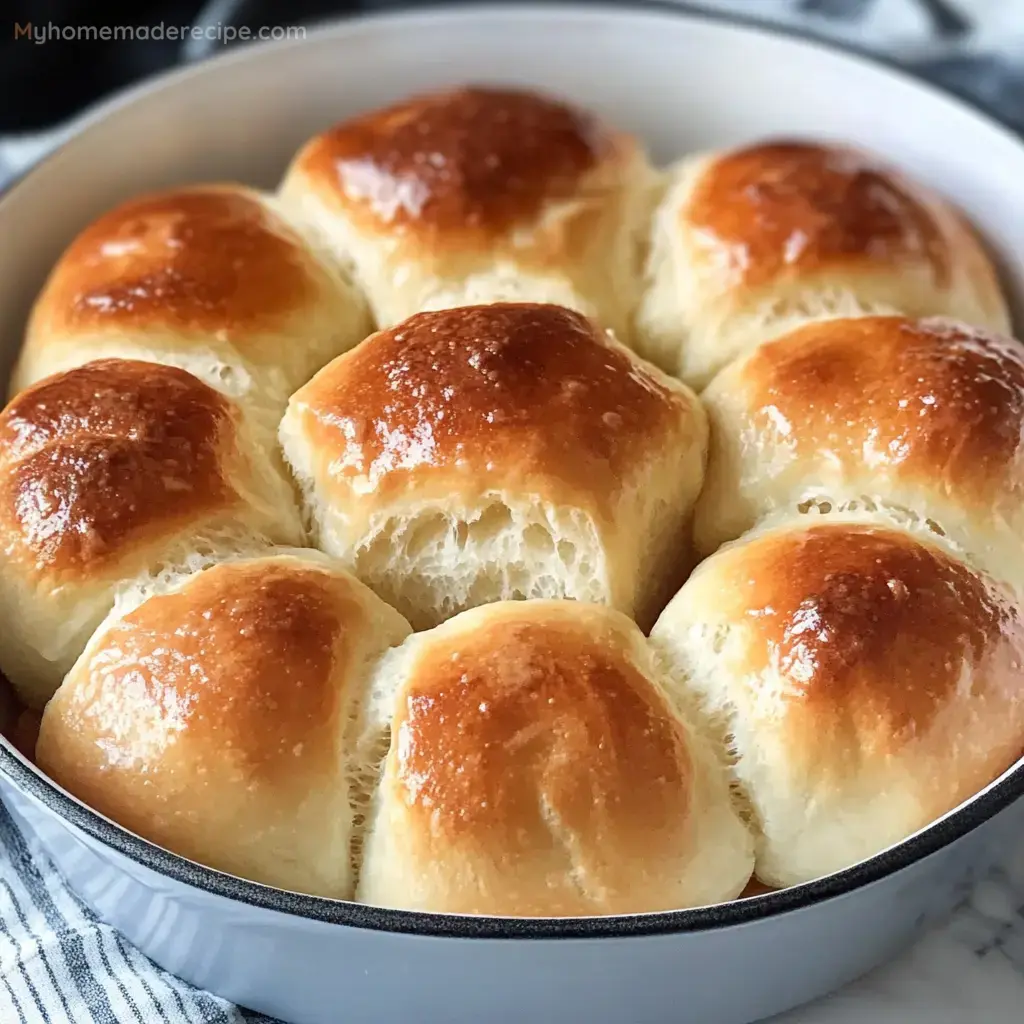
- With a 2" scoop or 1/3 cup measure, drop 9 dough balls into the pan. Put one in the middle and arrange the others in a circle around it. Wet your fingers with warm water and gently smooth the tops of each ball. Keep wetting your fingers if the dough gets sticky.
Letting Them Grow
- Step 1:
- Put a clean towel over the pan and set it somewhere warm for 45-60 minutes. This waiting time matters a lot since it lets the yeast work its magic, making your rolls light and fluffy.
Oven Time
- Step 1:
- Turn your oven on to 400°F near the end of the rising period.
- Step 2:
- Put the pan on the middle shelf and bake for 25-28 minutes. They're done when the tops turn golden and if you have a thermometer, the inside hits 200°F. Watch them carefully since all ovens heat differently.
Last Touches
- Step 1:
- Take the rolls out and immediately brush some extra melted butter on top - about 1/2 to 1 tablespoon does the trick. This makes them taste even better and gives them a nice shine.