
 Pin
Pin
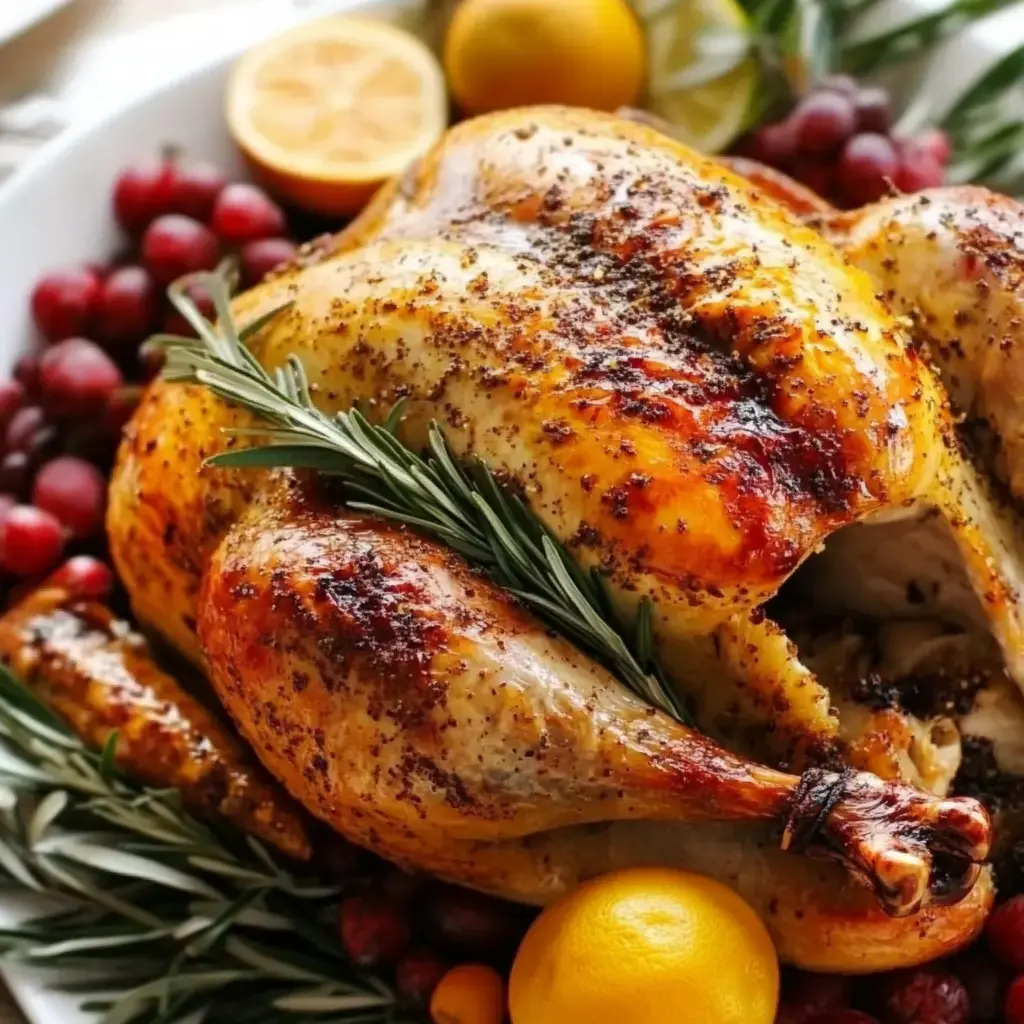
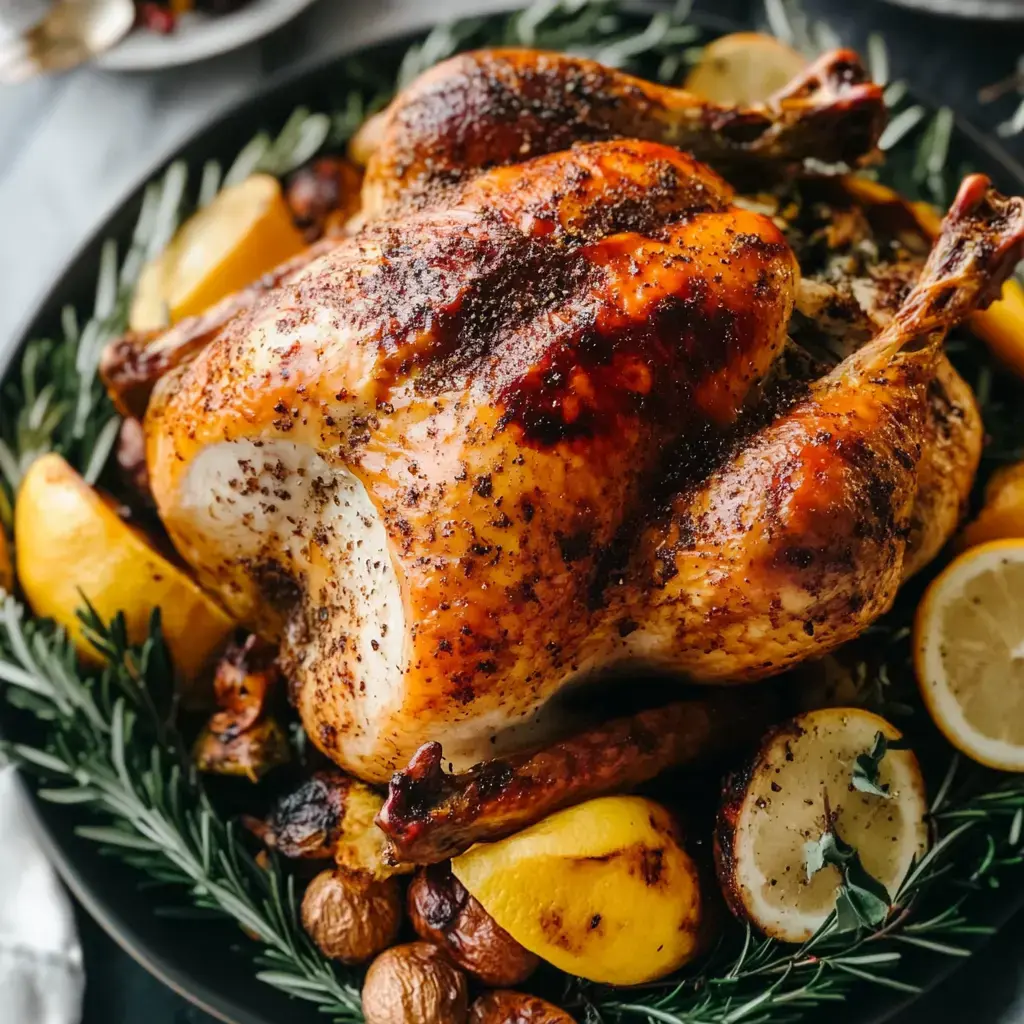
Skip complicated steps like brining and basting with this hassle-free turkey approach. It works great for kitchen newbies and pros alike, giving you a juicy, golden-brown bird every time. Just use simple herb butter and watch your temperatures carefully for success with any turkey between 12-18 pounds.
What Makes This Method Foolproof
We've cut out all the unnecessary fuss to focus on what truly counts. The flavorful herb butter keeps everything moist without you standing by the oven. Clear temp guidelines take away all the guesswork. You'll only need three tools: a sharp knife, meat thermometer, and roasting rack. These uncomplicated steps deliver great results whether you're feeding just a few people or hosting a big family dinner.
Ingredients & Tools
- Turkey: A 12-18 pound bird, fully thawed and sitting at room temperature
- For the cavity: 2 sprigs each of fresh sage, rosemary, and thyme, 1 lemon cut in quarters, 1 onion cut in quarters
- For the butter rub: 6 minced garlic cloves, ¾ cup softened butter, 1 tablespoon each of chopped thyme and rosemary
- Seasonings: Black pepper and kosher salt for the cavity and butter mixture
- Optional vegetables: 2 diced carrots, 3 sliced celery stalks, 1 quartered onion for the roasting pan
Easy Cooking Method
- Prep Work
- Pull turkey from refrigerator 1 hour ahead. Warm oven to 325°F. Take out giblets and dry turkey thoroughly with paper towels.
- Initial Seasoning
- Add plenty of pepper and salt inside the cavity. Stuff with herbs, onion, and lemon. Combine softened butter, herbs, garlic, pepper, and salt until smooth.
- Apply Butter Mixture
- Gently separate skin from meat without breaking it. Rub a third of your butter mix under the skin, then spread the rest all over the outside until fully coated.
- Roasting
- Set turkey on vegetables or rack. Roast roughly 15 minutes per pound until it hits 160°F in the thickest part. If skin gets too brown too fast, cover with foil.
- Finishing Up
- Let it sit for 30 minutes before cutting. Make sure internal temp reaches 165°F. Carve and serve while still warm.
Smart Thawing Tips
Don't rush the thawing process - it needs more time than most people think. Keep your bird in the refrigerator allowing 24 hours for every 5 pounds. For a 15-pound turkey, begin thawing 3 days before cooking day. Place the wrapped turkey on the bottom shelf on a tray to catch drips. Room temperature thawing isn't safe and can make everyone ill. In a time crunch? Try cold water thawing, but switch the water every half hour.
 Pin
Pin
Avoid Rinsing
There's no need to wash your turkey and doing so just creates a mess. Your oven will kill bacteria during cooking, while washing spreads germs all over your kitchen counters. Just use paper towels to pat everything dry. This step helps create crispy skin and keeps your cooking area clean. Always use separate cutting boards and wash hands thoroughly after touching raw poultry.
Stuff the Pan, Not the Bird
Always cook your stuffing in a separate dish rather than inside the turkey. Filling the cavity adds way too much cooking time and often results in soggy stuffing. Just toss some lemons, onions, and herbs inside for flavor instead. This approach lets both dishes cook perfectly. Your stuffing gets a nice crunchy top while your turkey cooks faster and more evenly.
Tricks for Perfect Skin
Want amazingly crispy, golden skin? Dry your turkey completely and let it hang out uncovered in the fridge overnight or for several hours. Apply your herb butter mixture both under and over the skin just before cooking. Try not to open your oven too much - each time you peek, the temperature drops and cooking takes longer. The butter will work its magic without any basting, creating perfectly crispy, brown skin.
 Pin
Pin
Patience Pays Off
Don't rush to carve once your turkey finishes cooking. Let it sit for at least 30 minutes, or up to an hour for larger birds. This waiting period keeps all the juices inside the meat. Cut too early and those juices run away, leaving you with dry turkey. Just loosely tent with foil to maintain warmth. Use this downtime to whip up gravy, warm your side dishes, or call everyone to the table. You'll be rewarded with incredibly juicy meat.
Wrap-Up
Into easy meals? You might enjoy herb-roasted chicken next time or pair this dish with lemony veggies. Even mashed potatoes with garlic go hand in hand with these flavors!
Frequently Asked Questions About the Recipe
- → Can I prep herb butter in advance?
Sure! Whip it up 2 days before and store tightly wrapped in the fridge. Let it soften before using. Some folks freeze it, but make sure not to spread it cold; it won't work. Adding zest? Do it fresh for bold flavor.
- → What if I don’t have fresh herbs?
No problem! Swap in dried herbs, but use a third of the amount. Mix them well with butter to bring out flavor. While fresh is great, dried can save the day. Just go easy since dried herbs pack more punch. Rosemary, thyme dry well, unlike basil.
- → How can I tell if it's ready?
Stick a thermometer into the thickest part of the thigh—it should read 158-160°. Avoid touching bone or you'll get the wrong number. Test a few spots just to be sure. Forget the color check; rely on temperature. White meat cooks quicker, so check both. Rest to 165° for juicy meat.
- → Is stuffing the bird a good idea?
Not really—cook it separately instead for better results. The bird cooks more evenly this way. Use the cavity for aromatics like onions, lemons, and herbs. Bonus: stuffing in the pan gets a crusty top and cooks faster. Herbs and citrus in the bird work best for flavor.
- → How long should the turkey rest?
At least 30 minutes, but aim for 45 if you can. This lets the juices soak back into the meat. Cover loosely with foil to keep it warm without trapping moisture. Use the wait to whip up sides or gravy. Don’t carve too soon or you’ll lose all that juice!