 Pin
Pin
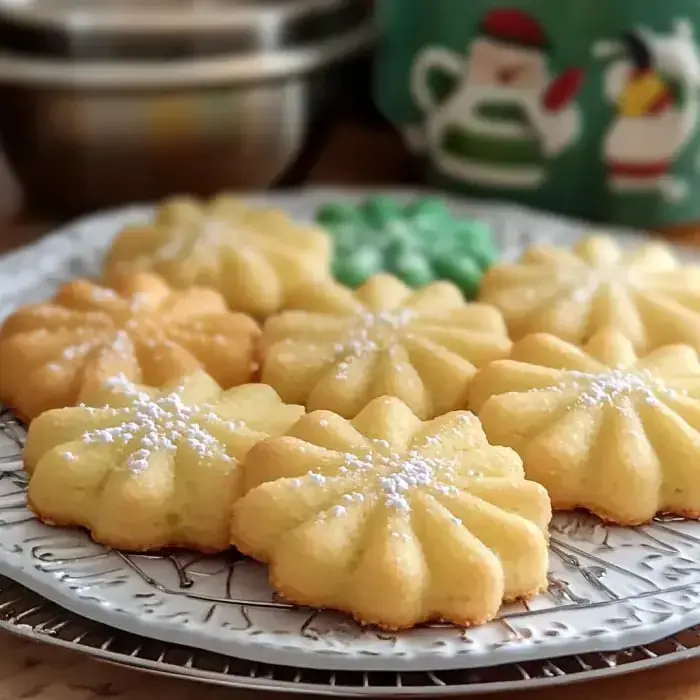
Whip up these adorable Spritz Cookies during holiday time. They're melt-in-your-mouth buttery treats with hints of vanilla and almond. Pop them through a cookie press for cute designs, then dress them up with bright colors and festive sprinkles.
Benefits Worth Noting
They look fancy but don't take much work. Perfect for gifting or adding to holiday cookie selections. These little gems stay firm outside but melt when you bite in. Switch up your colors and patterns for different celebrations. The little ones always get excited about creating various shapes.
Ingredients List
- Butter: 1 cup softened, just right
- Sugar: 2/3 cup granulated
- Salt: Small dash
- Egg: 1 large
- Vanilla: 1 spoon
- Almond Extract: 1/4 spoon
- Flour: 2 cups all-purpose
- Food Color: Optional touch
- Sprinkles: For decoration
- Cookie Press: To create designs
Preparation Steps
- Prep your oven:
- Set to 350°. Keep cookie sheets clean without grease so the dough sticks properly.
- Combine butter mixture:
- Whip butter, sugar and salt together for around 3 minutes until it's airy and pale.
- Mix in liquids:
- Drop in egg, vanilla, and almond. Blend until everything's combined.
- Add some color:
- Feeling colorful? Now's the time for food coloring drops. Stir until the shade looks even.
- Work in flour:
- Gradually add flour. Don't overmix or you'll end up with hard cookies.
- Load your press:
- Scoop dough into cookie press. Select your favorite disc pattern.
- Form your cookies:
- Press directly onto the bare baking sheet. Keep some space between each one.
- Decorate now:
- Toss on sprinkles before baking if you're using them.
- Into the oven:
- Bake about 8 minutes until edges just begin turning golden. They shouldn't brown completely.
- Finishing touch:
- Let them rest briefly on the pan. Transfer to cooling rack after a few minutes.
 Pin
Pin
Unique Appeal
The cookie press creates gorgeous shapes like flowers and wreaths. Each cookie becomes a tiny masterpiece. They taste wonderfully sweet with buttery goodness. Kids absolutely love choosing different designs and colors. These fancy-looking treats will upgrade any cookie platter.
Perfect Consistency Tips
Your butter should feel soft to touch but still hold shape. Beat the butter-sugar mix thoroughly for lighter cookies. The almond extract isn't optional, it gives that signature flavor everyone loves. Your dough needs to feel pliable but not tacky. No waiting around either, you can start baking straight away.
Variety Options
Try dividing your dough to create multiple colors. Go with festive greens for tree shapes or bright reds for flowers. Switch press discs between colors for more fun. Some bakers create swirled effects by combining two dough colors. Let your creativity flow with different combinations.
Decoration Ideas
Add sprinkles before they go in the oven so they'll stick better. Want to ice them? Make sure they're completely cool first. A tiny bit of corn syrup brushed on top helps decorations stay put. Just don't go overboard with heavy toppings or they'll tumble off.
Storage Solutions
Make sure they're totally cool before storing them away. Pop them in an airtight container with a snug lid. They'll stay tasty for up to a week if anyone can resist them that long. Need to freeze some? Stack them in containers with parchment between layers. They'll keep well frozen for about 3 months. Package them in cute boxes for wonderful homemade gifts.
 Pin
Pin
Wrap-Up
Enjoy these? Try classic butter cookies—same taste, round look. Or go for shortbread if you prefer a rich buttery flavor. These cookies are simple to make but look impressive when served!
Frequently Asked Questions About the Recipe
- → How do I keep them fresh?
Store them in an airtight tin or container—these stay crisp for about a week at room temp. Use wax paper between layers to keep shapes intact. Want them longer? Freeze for up to 3 months.
Some tips: Let them cool all the way before storing. Keep them separate from other cookies so flavors don’t mix. If they soften, a quick 3-4 minute bake at 300°F gets the crunch back. Metal tins seem to work better than plastic for crispness.
- → Can I switch up the flavors?
Absolutely! Add a teaspoon of lemon or orange zest, or use a few drops of flavored oils—just a little, they’re strong. Mint’s great for winter, lemon for warm months, and cinnamon works anytime.
Craving chocolate? Mix in cocoa and take out that much flour. Just avoid adding liquid—it messes up the dough. Whatever you try, the buttery flavor should still stand out.
- → Why avoid lining the pan?
Because the dough needs the pan to stick and hold its shape when pressed. Lining makes it slide around. Go with clean pans, and even chilling them first can help.
If they won’t stick, your pan might be too warm or have leftover grease. Rinse, dry, and try again. No need to grease—feels weird, but trust the process! They’ll pop off fine after baking.
- → Are there wheat-free options?
Use a cup-for-cup gluten-free flour mix that includes xanthan gum. The dough might need extra chilling time since GF flour works differently. The shapes may blur a bit, but it’ll still taste amazing.
Some brands like Bob’s Red Mill or King Arthur work well. Expect a bit more spreading, so leave good space between cookies. And since GF flour browns quicker, keep a close eye on bake time.
- → How do I avoid overbaking?
Keep an eye on the bottoms—remove them as soon as they barely start turning golden. The tops should stay light. Set your timer for 7 minutes to check early.
Pans heat differently, so pay attention to the first batch. Cool pans between rounds to avoid extra spreading. If they’re browning too quickly, lower the oven temp by 25°F.
