 Pin
Pin
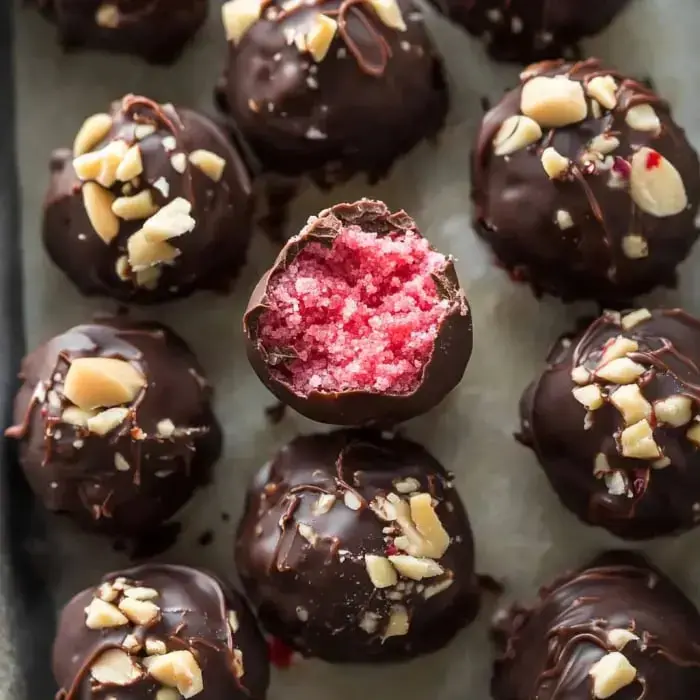
These delectable Cherry Mash Bites offer a homemade twist on classic candies with their velvety cherry inside wrapped in a chocolatey peanut shell. They'll transport you back to childhood with every bite and work perfectly as holiday treats or whenever you want something sweet with cherry flavor.
Delightful Cherry Memories
Whenever I whip up these bites, my whole kitchen gets filled with that wonderful cherry smell that takes me right back to those old-school candies from my younger days. There's nothing quite like bringing those good times back to life in your own home and seeing folks' faces light up when they taste these and go "wow, just like the real thing!"
What You'll Need
- Cherry Flavored Chips: You'll need 2 cups of top-notch cherry chips for bold taste and color.
- Powdered Sugar: Grab 3 cups and make sure it's sifted for that smooth feel.
- Milk: Pour in 1/2 cup of whole milk that's not cold for extra creaminess.
- Cherry Bakery Emulsion: Add 1 teaspoon to really pump up the cherry flavor - brands like LorAnn Oils work great.
- Chocolate Chips: Get 2 cups of semi-sweet or milk chocolate chips for your outer layer.
- Chopped Peanuts: Mix in 1 cup of finely chopped unsalted peanuts for that special chocolate coating.
Let's Make Them Together
- Make the Cherry Center
- Grab a microwave-safe bowl and melt those 2 cups of cherry chips in 30-second bursts, giving them a good stir each time until they're nice and smooth. Then mix in 3 cups of powdered sugar, 1/2 cup of milk, and 1 teaspoon of cherry bakery emulsion until you've got a soft, pliable dough.
- Shape and Chill
- Take that cherry mixture and roll it into little 1-inch balls. Put them on a baking sheet lined with parchment paper and stick them in the fridge for at least 30 minutes so they can firm up.
- Prepare Chocolate Coating
- Take another microwave-safe bowl and melt 2 cups of chocolate chips the same way, 30 seconds at a time with stirring breaks until smooth. Then fold in that cup of chopped peanuts so they're all mixed up nicely.
- Dip the Truffles
- Get your cold cherry balls and dunk each one into the chocolate peanut mix using a fork or special dipping tool. Let the extra drip off and put them back on your parchment-lined sheet.
- Set the Truffles
- Let your finished treats hang out at room temp or pop them back in the fridge for about 15-20 minutes until the chocolate gets totally firm.
Making Sweet Moments
These little treats have grown to be such a special part of how we celebrate the holidays. You can see those bright pink centers peeking through the chocolate coating which makes them look so pretty, and that mix of cherry, chocolate and peanuts is just too good to pass up. I love watching everyone's reactions when they taste that familiar Cherry Mash flavor they haven't had in years.
Spread The Happiness
What I really love about these bites is how great they look when you're giving them as gifts. I often put them in cute holiday boxes or old-school tins with pretty ribbons around them. They always disappear fast at cookie swaps and make such nice handmade presents, especially for folks who grew up eating those original Cherry Mash candies.
 Pin
Pin
Frequently Asked Questions About the Recipe
- → Why chill the cherry pieces before coating?
Chilling stops the centers from breaking apart or collapsing into the chocolate. Plus, it gives the coating a better finish.
- → How does coconut oil improve the chocolate?
Coconut oil makes the chocolate flow easier, giving the candies a shinier, smoother finish that sets up beautifully.
- → What’s the benefit of storing them cold?
Putting these in the fridge keeps the chocolate firm and the centers tender. Leaving them out too long softens everything too much.
- → Can I swap the flavoring for regular cherry extract?
The emulsion gives a bold taste, but standard cherry extract works too. Just adjust the amount depending on how strong it is.
- → Why not dump all the sugar in at once?
Sifting sugar bit by bit stops clumps from forming. It also helps you nail the ideal texture one step at a time.
