
 Pin
Pin
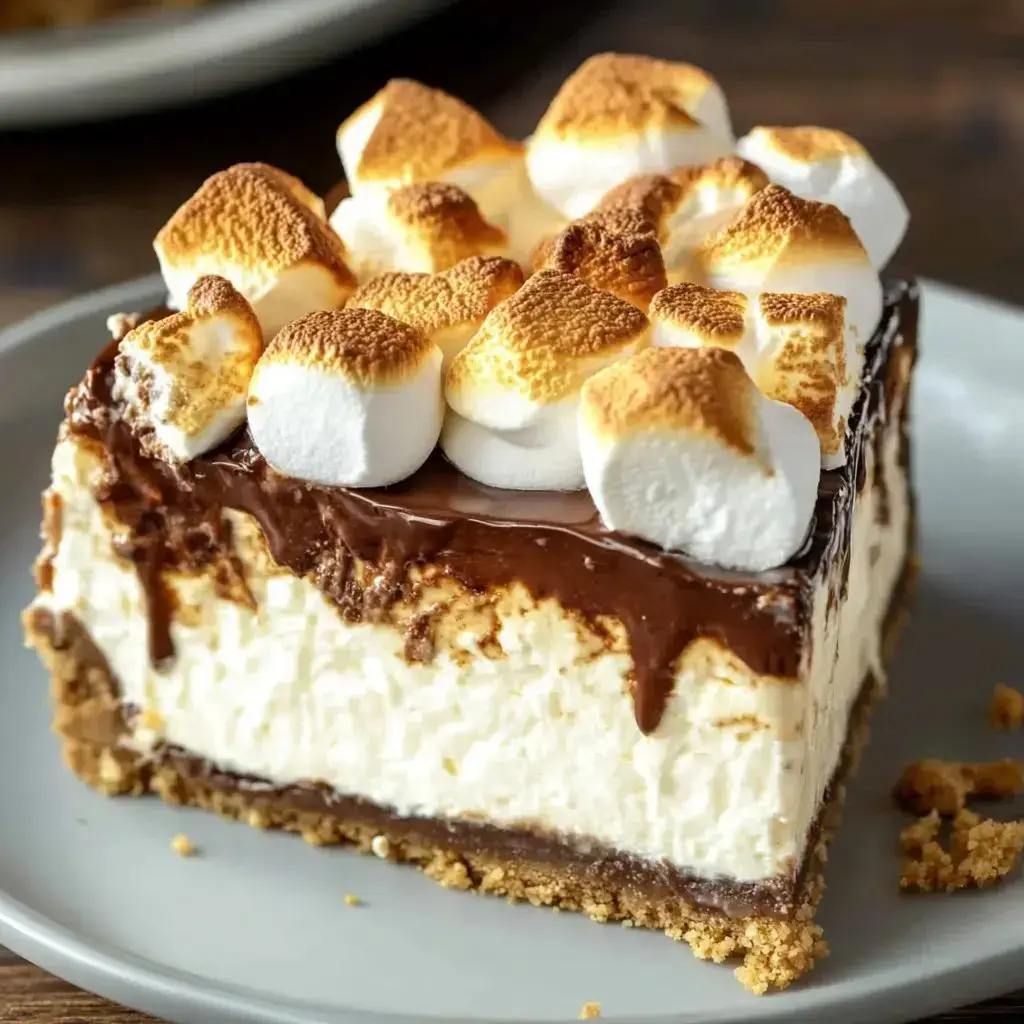
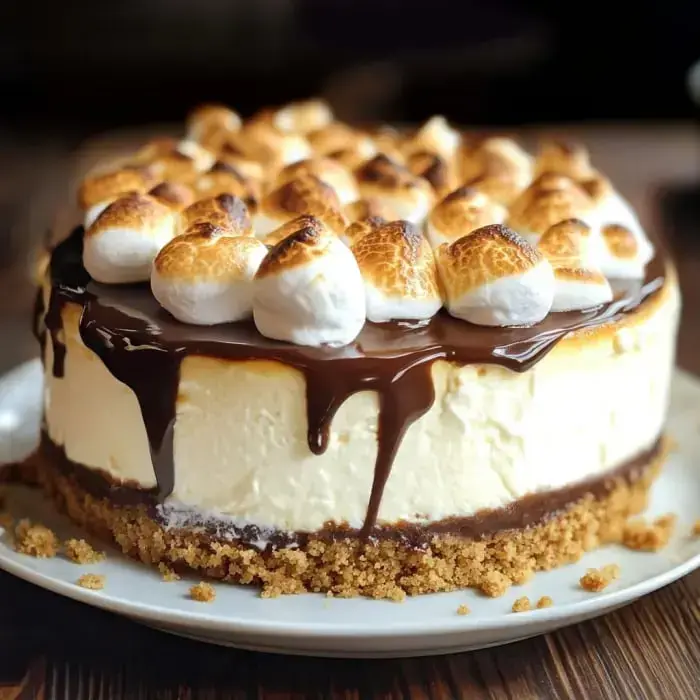
Amazing Campfire-Inspired Cheesecake
Wow friends, I can't wait for you to try this one. My campfire-inspired cheesecake brings together all the magic of outdoor treats with smooth, rich cheesecake goodness. You'll love the buttery graham base, the creamy middle layer, and that dreamy mix of melted chocolate and toasty marshmallows on top. It looks fancy enough for special occasions but trust me, it's way simpler than it seems.
What Makes This Dessert So Special
Think of this as your childhood favorite all grown up. You'll get that awesome mix of smooth cheesecake, melty chocolate and golden marshmallows in every bite. I always bring this to backyard gatherings and everyone's eyes light up when they see it. Between you and me though, it's actually pretty straightforward to make despite its showstopping looks.
Your Shopping List
- For That Crunchy Base: Graham cracker crumbs you can buy ready-made or crush them yourself.
- The Fat Component: Melted butter to bind your crust nicely.
- Flavor Boost: Good vanilla extract makes everything tastier.
- The Camping Touch: Mini marshmallows for that authentic outdoor vibe.
- Sweet Melty Goodness: Semi sweet chocolate chips because everything's better with chocolate.
- The Star Ingredient: Softened full fat cream cheese for ultimate creaminess.
- Sweetener: Basic granulated sugar to balance the flavors.
- Texture Helper: A small amount of cornstarch for that perfect consistency.
- Binding Agents: Fresh eggs to pull everything together.
- Luxurious Addition: Heavy cream for that melt-in-your-mouth feeling.
- Finishing Touch: Hot fudge sauce to make it unforgettable.
 Pin
Pin
Step-By-Step Instructions
- Create Your Base
- Start by warming your oven to 325°F and greasing a springform pan. Mix your graham crumbs with melted butter, vanilla and brown sugar, then press the mixture into your pan, going slightly up the sides.
- Add Some Campfire Magic
- Scatter chocolate chips and a handful of marshmallows directly onto your prepared crust.
- Mix Your Filling
- Whip your cream cheese until it's completely lump-free, then add your remaining ingredients, mixing until just combined. Pour this mixture over your prepared base.
- Water Bath Technique
- Place your cheesecake pan inside a larger pan, fill with hot water halfway up, and bake for around 90 minutes. Then let it cool gradually in the warm oven and on your counter.
- Cooling Period
- Let it firm up in the fridge for at least an hour.
- Add Your Toppings
- Spread warm fudge sauce across the top and sprinkle with plenty of mini marshmallows.
- Get That Golden Look
- Quickly broil until your marshmallows turn golden, then cool in the fridge for 4 hours.
Tricks For Perfect Results
Don't skip letting your cream cheese soften - it's crucial for a lump-free filling. Try not to mix your batter too much as we want it smooth but not airy. Always wrap your springform in foil before the water bath to avoid a wet crust. And keep a close eye when broiling those marshmallows - they'll go from perfect to charred in just a moment.
Storage Advice
Your cheesecake will stay delicious in the fridge for about 5 days if you cover it well. Need to plan ahead? You can freeze it without toppings for up to 3 months if you wrap it carefully. When you're ready to enjoy it, just move it to the fridge overnight and add those yummy toppings before serving.
Fancy Serving Ideas
Want to make it even more impressive? Add some extra hot fudge when serving or top with freshly whipped cream. I love pairing this with a cup of coffee or hot cocoa, but honestly, a tall glass of cold milk works perfectly too. This is my favorite treat to bring to summer get-togethers, birthday celebrations, or anytime I want to make someone feel extra special.
 Pin
Pin
Frequently Asked Questions About the Recipe
- → Why do I need to bake with a water bath?
It keeps the cheesecake cozy in a moist environment and stops cracks from showing up. Even baking and perfect texture every time!
- → How can I stop water from seeping into the pan?
Wrap your springform pan securely with heavy-duty foil, going up the sides. Using two layers will make it extra watertight.
- → How can I tell if my cheesecake is set?
The edges should look firm while the center wiggles just a little. Don't poke it with a knife—it can ruin the smooth top. It sets fully as it cools.
- → Can this dessert be made ahead?
Absolutely, you can prepare it 2-3 days early. Hold off on adding fudge and toasting marshmallows until serving to make it picture-perfect.
- → Why is cooling it gradually important?
Slow cooling avoids cracks and keeps that creamy, dreamy texture. Never fast-track it to the fridge or it might not set right.