
 Pin
Pin
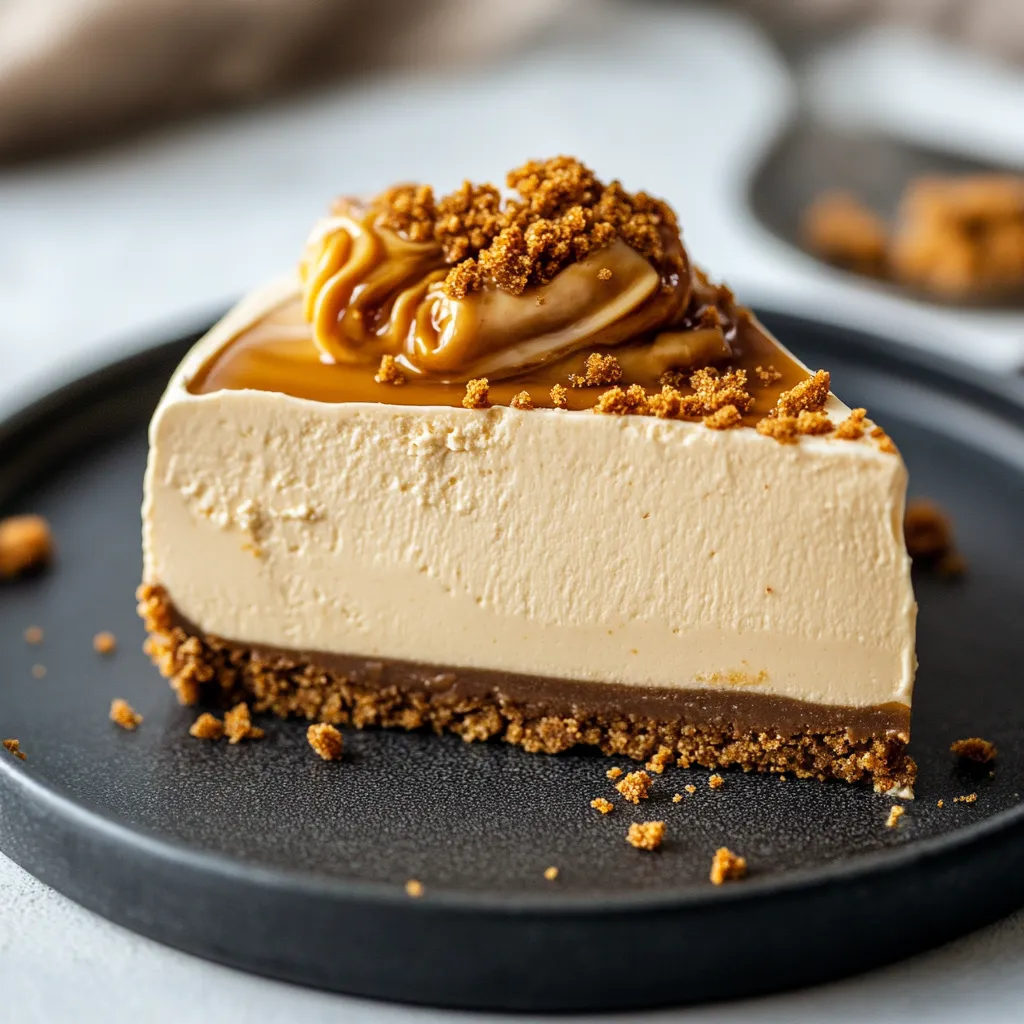
This smooth Biscoff cheesecake has been my go-to dessert for countless get-togethers and family events. The sweet, caramel-like flavor of Biscoff cookies combined with silky cheesecake creates something truly special. I've tweaked this recipe many times to get just the right mix of creaminess and crunch.
I baked this for my neighbor's birthday party last week. Watching everyone's face light up with their first taste reminded me why I can't stop sharing this dessert. Their plates were empty in minutes, and I left with several people asking me for the instructions.
Key Ingredients Breakdown
- Biscoff Cookies: Our main attraction. Pick packages that aren't damaged or broken as this might mean they're not fresh
- Full-Fat Cream Cheese: My golden rule is don't cut corners on cream cheese. It makes all the difference
- Double Cream: Should be fresh and cold from the fridge. A gentle shake should tell you it's nice and thick
- Biscoff Spread: My hidden trick that boosts the wonderful caramel notes
- Unsalted Butter: Keeps our base firmly together
- Optional Toppings: Extra cookies for decoration, fresh fruit adds nice color contrast
Easy Preparation Guide
- Getting Ready:
- Pick a deep 9-inch springform pan. Cover the bottom with parchment paper that goes slightly up the edges. Lightly butter the sides.
- Making Your Base:
- Crush Biscoff cookies into fine pieces using a food processor or rolling pin. Melt some butter and mix with crumbs until everything's coated. Push firmly into your pan and chill.
- Perfecting Your Filling:
- Whip room temperature cream cheese until it's completely smooth. Slowly add Biscoff spread at room temperature. In another bowl, whip cold double cream to soft peaks.
- Putting It All Together:
- Mix whipped cream into your cream cheese blend. Pour this onto your chilled base and smooth it out. Tap the pan on the counter to get rid of bubbles.
- Adding Decoration:
- Heat a bit more Biscoff spread until runny and drizzle over the top. Sprinkle crushed cookies around the edge before the spread hardens.
 Pin
Pin
My daughter keeps jars of Biscoff spread in her kitchen just for making this cheesecake. The warm, spiced flavor makes me think of relaxing afternoons with coffee and good company.
Silky Smooth Results
Getting that velvety texture comes down to watching your temperatures. Each component plays its part in the final slice. Let your cheesecake sit out for 15-20 minutes before serving to really bring out all the flavors.
Ways To Serve
This cheesecake is fantastic on its own, but I enjoy adding seasonal touches. In summer, try adding tart raspberries. During autumn, a light sprinkle of cinnamon highlights the spices. For fancy occasions, try a thin drizzle of dark chocolate for extra luxury.
Keeping It Fresh
Your cheesecake will stay good in the fridge for up to 5 days when covered. Use a cake container or carefully wrap it without touching the top. If you want to freeze it, cut it first and put parchment between pieces so you can thaw just what you need.
Quick Fixes
If your mixture seems too runny, you probably didn't whip the cream enough. Stick it in the freezer for half an hour before continuing. If your base falls apart, just chill it a bit longer.
 Pin
Pin
After trying so many cheesecake recipes over the years, this Biscoff version remains my favorite creation. There's something magical about turning everyday ingredients into a treat that makes people smile. It's not just about eating dessert but creating happy moments around the table.
Frequently Asked Questions About the Recipe
- → How long should this dessert stay in the fridge?
- Let it chill for at least 4 hours, but for the best texture, aim for overnight.
- → Why use full-fat cream cheese?
- It gives the dessert a smooth texture and ensures it firms up without baking.
- → Can this dessert be made ahead?
- Absolutely, it's a great make-ahead option since the fridge time helps set it perfectly.
- → How do I get it out of the pan easily?
- Slide a knife dipped in warm water around the edges to loosen it for easy removal.
- → Is gently melting the spread really necessary?
- Yes, doing it slowly keeps it from overheating and affecting the creamy layer.