
 Pin
Pin
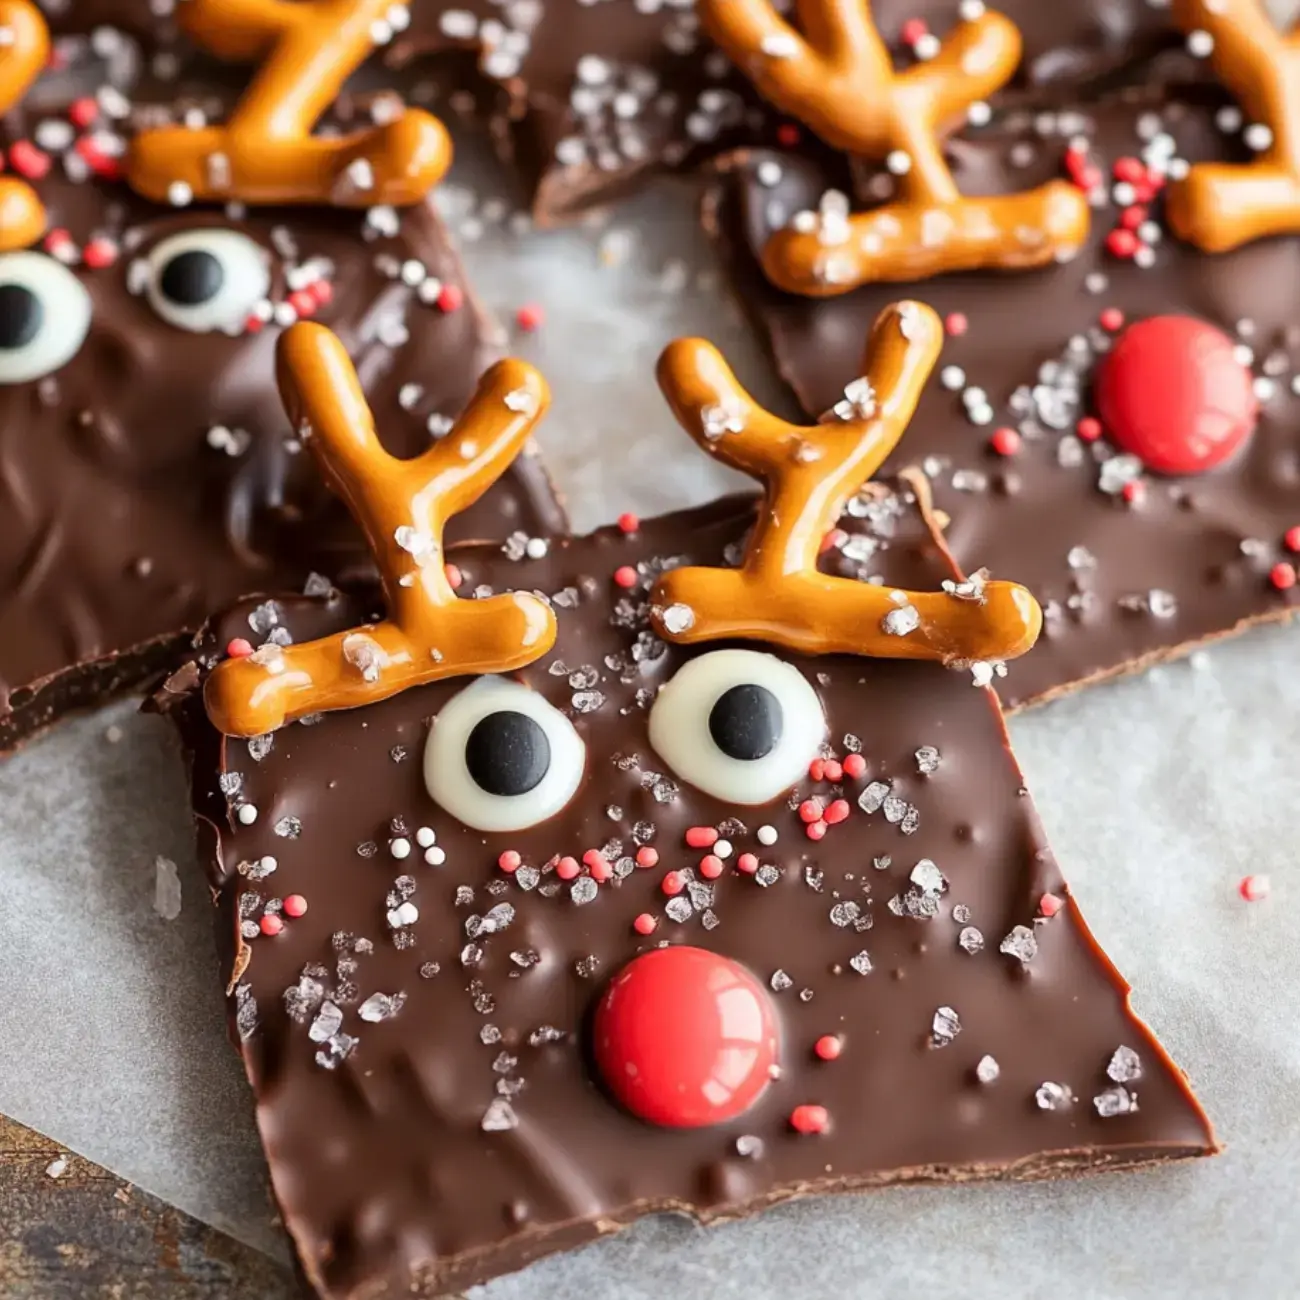
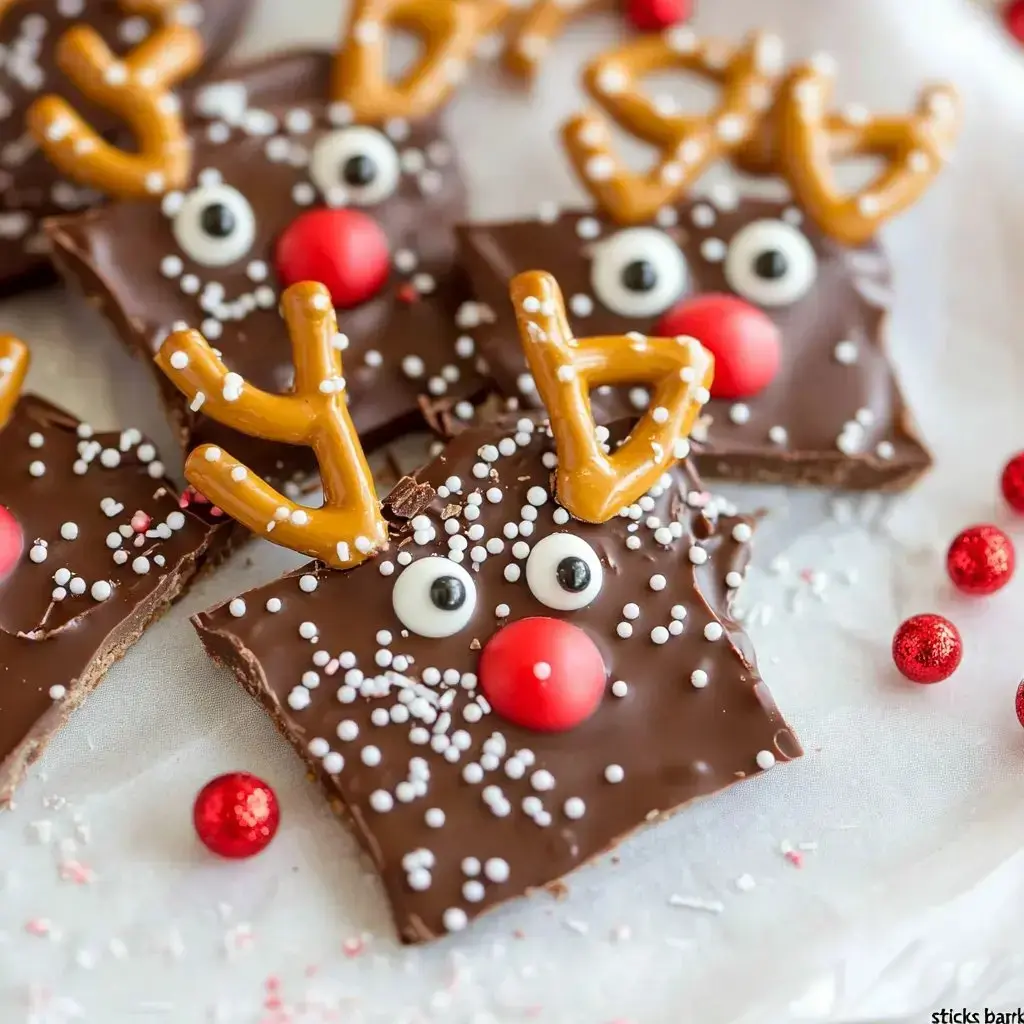
Gosh, I can't wait to tell you about my Chocolate Reindeer Bark! It's turned into one of our yearly holiday customs, making these cute treats alongside my children. The smooth chocolate blends so nicely with the snap of pretzels and those adorable candy faces, bringing tons of happiness to our home during the Christmas season.
The Absolute Magic Behind This Sweet Treat
What gets me most excited about Reindeer Bark is how easy and fast it comes together. That sweet-salty mix is downright impossible to resist, and seeing kids grin when they spot those darling reindeer designs makes everything worthwhile. It's also a fantastic DIY present that keeps well for quite a while.
Your Shopping List
- Chocolate candy melts: Grab top-notch chocolate wafers for easy melting and tastier results.
- Pretzels: Go for complete pretzels you can snap into "antlers" shape; try to find ones without too much salt.
- Clear sprinkles: They'll give your bark that extra shine and wonderful crunch.
- Candy eyes: These create the fun faces; make sure they're food-safe and fit your design nicely.
- Red candy balls: These small red sweets make perfect reindeer noses; tiny M&Ms do the trick too.
Creating It Step By Step
- Get Your Chocolate Ready
- Drop your chocolate candy melts into a microwave-safe container. Warm them in short 15-30 second bursts, giving a good stir each time to stop burning, until they've turned completely smooth.
- Lay It Out
- Dump the warm chocolate onto a baking tray lined with parchment. Use your spatula to smooth it out into a layer about 1/4-inch thick.
- Add The Fun Stuff
- While it's still warm, push in the snapped pretzel bits, candy eyes, and red candy balls to make cute reindeer faces. Finish by scattering clear sprinkles across the top.
- Cool It Down
- Put the whole tray in your fridge. Let it cool all the way through until it's completely hard before you try handling it.
- Snap It Apart
- Once it's fully hardened, break the chocolate into smaller chunks using dry hands or cut with a sharp knife for cleaner edges without smudging the decorations.
Insider Tricks
Don't skimp on chocolate quality or try adding a tiny bit of coconut oil to regular chocolate for smooth melting. I've found putting it right in the fridge after adding decorations keeps everything in place. And grab a super sharp knife when breaking it up so your cute designs stay intact.
Storage Smarts
Your bark will stay yummy for about three months when kept in an airtight box at room temp. For gifting, those little cellophane bags tied with colorful ribbons look amazing. Just remember to store it somewhere cool so it doesn't melt away.
Switching Things Up
We sometimes create different versions for other celebrations by switching up candy colors. It's super fun trying new combos like white chocolate topped with crushed peppermint or dark chocolate sprinkled with toasted nuts. You can really go wild with ideas!
Common Pitfalls
The main thing to avoid is burning your chocolate as it gets lumpy fast. You'll need to work quickly adding decorations before the chocolate hardens and always use parchment paper to make cleanup a breeze afterward.
Kid-Friendly Fun
Getting kids involved in bark-making brings so much fun. I let my little ones design their own reindeer faces and they come up with such clever ideas! Just keep small children away from the hot chocolate and everyone will have a great time.
Tasty Pairings
We always munch on our Reindeer Bark while sipping hot cocoa during chilly winter nights. It goes great with other holiday snacks like fresh-baked cookies and spicy gingerbread. That mix of sweet and salty makes you want to grab piece after piece!
 Pin
Pin
Frequently Asked Questions About the Recipe
- → What’s good about candy melts?
- They melt smoothly and set firmly without tempering. Coconut oil helps if using regular chocolate.
- → Why is parchment paper important?
- It stops the bark from sticking and makes it easy to move before it hardens.
- → What’s the best way to store it?
- Use an airtight container at room temperature for three months or refrigerate to avoid melting.
- → Why keep your hands dry?
- Water can make colors run or transfer. Always handle the bark with dry hands or tools.
- → Why melt chocolate a little at a time?
- Stirring between short intervals stops the chocolate from burning and helps it melt evenly.