
 Pin
Pin
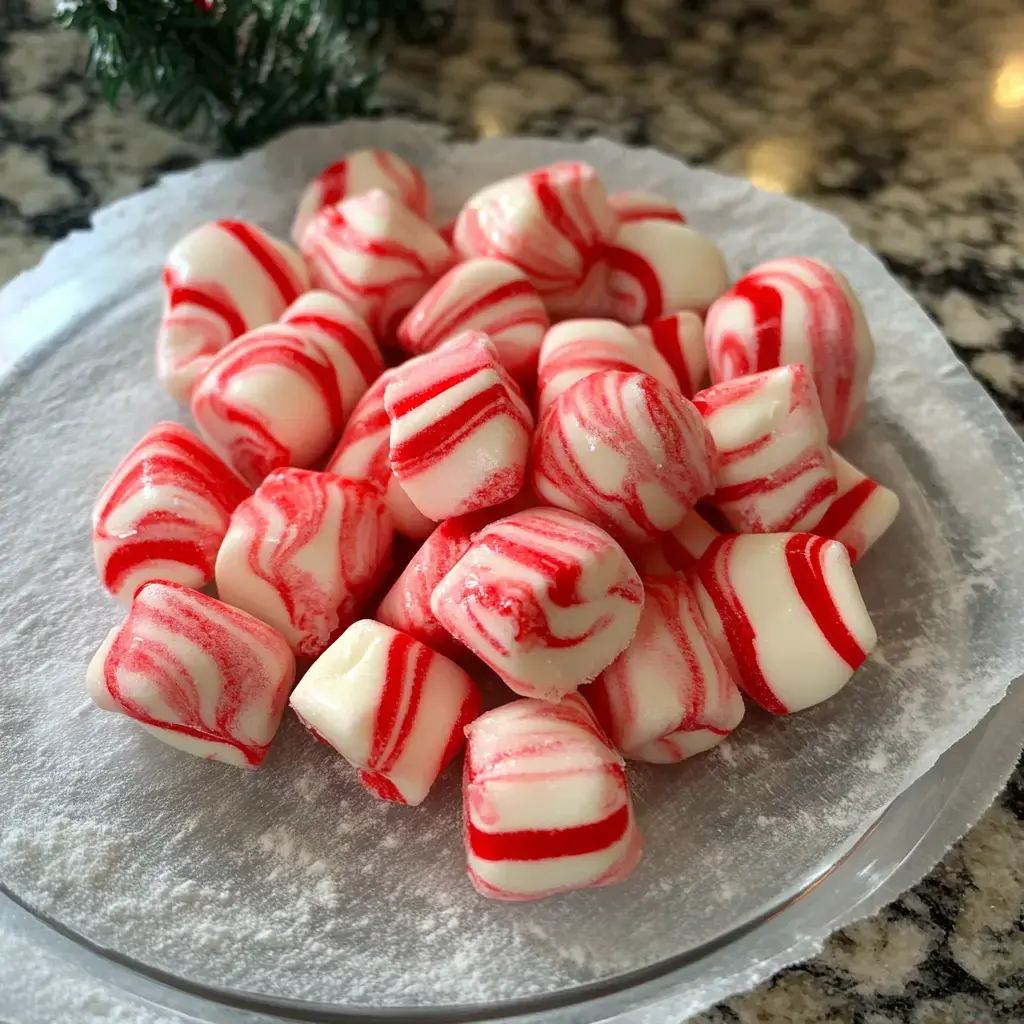
The Magic Behind These Heavenly Treats
These candies bring back all those warm holiday memories. They've got this incredible smoothness with a burst of peppermint that takes you back. You can whip them up with normal pantry stuff. When you twist the red and white together, they look just like mini candy canes - they'll wow everyone on your gift trays.Your Ingredient List
- Unsalted Butter: Creates that melt-away richness
- Heavy Cream: Adds the dreamy softness
- Peppermint Extract: Gives that refreshing cool flavor
- Powdered Sugar: Creates the silky-sweet base
- Red Food Coloring: For creating those festive swirls
The Making Process
- Prep your space:
- Lay wax paper across your workspace. Have extra powdered sugar ready for when things get sticky.
- Prepare butter:
- Let butter reach room temperature. Whip it in a large bowl until it turns airy and pale.
- Combine liquids:
- Gradually add heavy cream while beating. Mix in peppermint extract carefully - you can always put more in later if needed.
- Work in sugar:
- Slowly blend in powdered sugar. Keep mixing until it feels similar to modeling clay. Add more sugar if it sticks to your fingers.
- Divide mixture:
- Set aside roughly 1/4 of the dough for coloring. Keep the larger portion white.
- Color your dough:
- Mix red coloring into the smaller portion. Work it through until the shade looks uniform. Add extra drops for brighter color.
- Form your strands:
- Make a skinny rope from the red dough and a fatter one from white dough. Place them next to each other.
- Create swirls:
- Carefully twist both ropes together for a candy cane effect. Try not to flatten them.
- Form your candies:
- Snip small chunks from your twisted creation. Gently roll each piece in your palms to smooth them out.
- Initial drying:
- Arrange candies on wax paper. Let them sit about 2 hours until they don't feel tacky.
- Slice them up:
- Use a pizza cutter to chop the ropes into tiny rounds. Aim for penny-sized pieces.
- Complete drying:
- Allow candies to air dry for 24 hours. This step creates that signature melt-away texture.
- Pack away:
- Transfer to an airtight container. They'll keep for several weeks somewhere cool and dry.
The Legacy of These Sweet Bites
These tiny delights have brightened gatherings for generations, bringing joy to special occasions and holidays. Their buttery softness pairs perfectly with just the right hint of mint. Made from just butter, sugar, cream, and mint flavoring, they slowly dissolve on your tongue, leaving your breath wonderfully fresh.Our Festive Twist
We've updated these classic mints with candy cane-inspired red and white swirls for the holiday season. Though stores sell them in many colors, these Christmas hues make them truly seasonal additions to your dessert spread. That crisp minty kick captures everything we love about winter treats.Crafting Your Batch
Whipping up these mints isn't complicated at all. Start by covering your counter with wax paper to handle any spills. Blend softened butter with cream and sugar, then mix in that minty goodness. Divide your dough, turn one part red, then braid the colors together like a tiny candy cane. Wait for them to firm up before slicing into tiny treats.Storage Secrets
Once your mints have dried completely and been cut, pop them into something that seals well. No need to refrigerate them—they'll stay perfect at room temperature. Their vibrant swirls and zingy flavor will last throughout the entire holiday season.Flavor Adventures
Feeling adventurous? Switch to almond extract for wedding celebrations or try cinnamon for something with kick. Lemon, maple or vanilla work wonderfully too. Push the soft dough into candy molds for fancy shapes. Each flavor twist gives these classic mints their own unique personality.Wrap-Up
- Butter Cookies: Buttery, melt-in-your-mouth cookies
- Christmas Bark: Crushed mints and white chocolate duo
- Cream Cheese Mints: Sweet bites of cheese, sugar, and mint
Frequently Asked Questions About the Recipe
- → Can I change how minty they taste?
Of course! Start with just a drop of mint extract (1/8 teaspoon), mix, and taste. Add more as needed, but remember the flavor gets stronger as they dry. Most people use 1/4 to 1/2 teaspoon per batch. If you're a big fan of strong mint flavors, go up to 3/4 teaspoon.
- → What if I only have basic food coloring?
No problem! Store-bought liquid colors work just fine. Start by adding 2-3 drops and mixing well, then gradually add more to reach your preferred shade. If it makes the mix too soft, add a bit more powdered sugar until it's just right. Reds, greens, or even blues look great!
- → How do I store them to keep them fresh?
When they're completely dry, put them in an airtight container. If it's warm in your kitchen, refrigerate them—they'll stay good for up to 2 weeks. At room temperature, they're fine for about a week. Freeze them for longer storage (up to 3 months). Just thaw them before enjoying!
- → Can I make them dairy-free?
Yes! Just swap the butter for plant-based butter (the stick type, not from a tub) and use coconut cream instead of heavy cream. The mix might be a little different—add powdered sugar a bit at a time until it forms soft dough. You might need an extra day to dry them properly, but they'll still taste great. Some say almond milk works, though it makes softer candies.
- → How long until they're ready to eat?
They need a day—24 hours—to dry fully. After shaping them, you can leave them for 2 hours to set, but for that perfect texture, wait the whole day. If it's humid, they might need an extra day to dry. Be patient—they're worth the wait!